So the bumper is mounted and secured…now to cleanup the install. First order of duty is to cut the rubber and metal shock covers that were on there originally. Now this part isnt historically correct. the older cars had no shocks…so no shock covers were needed but since I decided to mount the small bumper using the large bumper mounting locations I had huge tubes that were visible. So I decided to use the shock covers, just trim them down to size. This did a few things. It cleaned up the install, hid the eyesore of a mount and now I have 6 less holes to fill because there are 3 per side. So now I have a grand total of TWO holes to fill on the front end. Nice. I alse elongated the mounting holes on the sides where the bumper ends mount to the fender so I can adjust them. I have now straightened the bumper ends and they are now level with the lines of the car instead of pointing down a bit. Next up, fog lights! The bumpers have holes in them for fog lights so I’ll slap a set on the front and the vintage look will be complete…
Bumper ends were adjusted so they are level.
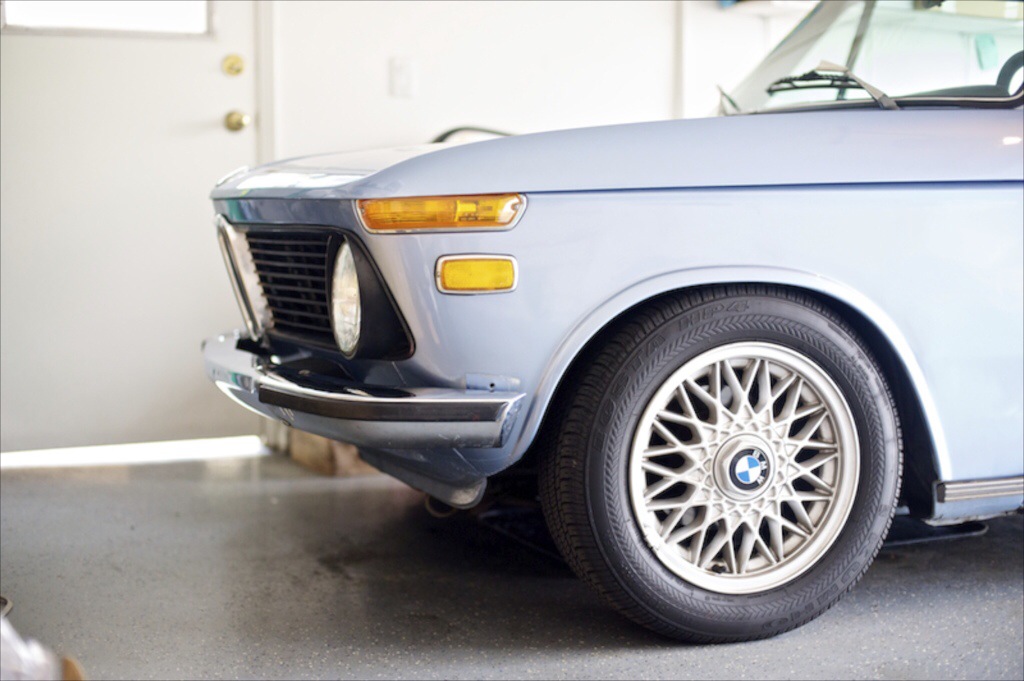
Bumper shock covers over the pipe and mounting bolt for the bumper really cleans up the installation.
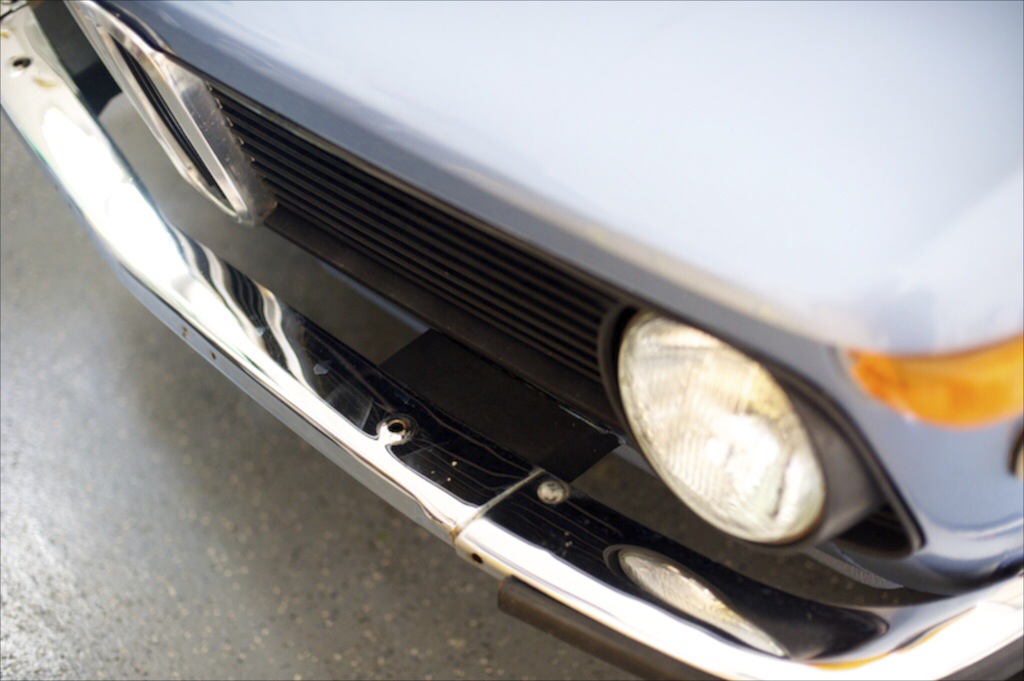
Just fill in the one hole per side where the old rubber accordions mounted to the fender.